3-point and 4-point editing
You can use the 3-4 Point Edit Mode in Pinnacle Studio to trim and add source clips to a sequence in the Timeline. 3-point and 4-point editing offers a quick and precise way to add clips. You can use 3-4 Point editing mode for any project, but it works particularly well for projects where you want align clips precisely, such as matching illustrative clips to narration or matching the clips to specific parts of a soundtrack.
“Points” refers to the “in point” (Mark In) and “out point” (Mark Out) markers that you add to the source clip and the Timeline. In most cases, you will likely use 3-point editing because it lets you edit precisely without adjusting the speed of clips. 4-point editing, in most cases, results in adjusting the speed of the clip so that it precisely fits a defined time in the Timeline.
How does it work?
In the Timeline, you can identify where you want to add a source clip by adding an in-point marker (for where you want the clip to start), an out-point marker (for where you want the clip to end), or both. The same is true for your source clip. You can add an in-point marker, an out-point marker, or both. The source clip will be trimmed according to these markers when you add it to the Timeline and overwrite any underlying content in the Timeline (non-destructive, the original files are protected). If you decide to set all 4 points, in most cases, the duration set in the Timeline will not match the duration of the trimmed clip. This means you need to alter the speed of the clip to fill the time defined in the Timeline, or, you can choose which 3 points are the priority, and allow the clip to run at its original speed.
Example of a 3-point edit
If you want to match a narrator’s description of a bear to a clip of a bear, in the Timeline you can set your in-point and out-point markers for the narration, and then evaluate your source clip that has the bear. Set either an in-point marker or an out-point marker, depending on your preference and the overall impact. If you use an in-point marker, when you drag the clip from the Library to the Timeline, it will automatically align the source and Timeline in-point markers and trim the source clip at the out-point marker set in the Timeline.
Fit Clip options
When you add clips to the Timeline in 3-4 Point Edit Mode, a Fit Clip message window appears. The windows provides you with a number of options that let you determine exactly how the clip will interact with the content in the Timeline. The options presented depend on the points set and the length of the clip in relation to the length of the gap on the Timeline.
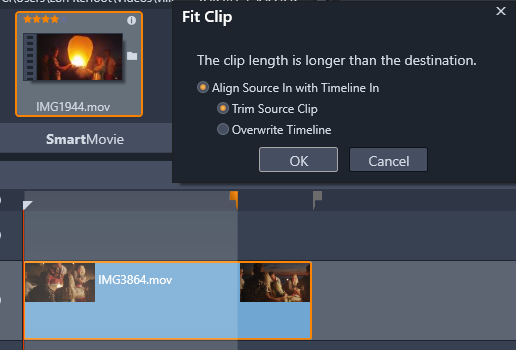
In this example, the Fit Clip window offers two options: Trim Source Clip, which means it will use a soft marker (gray marker) as a Timeline trim marker for the source clip because it represents the end of the current track. Or, Overwrite Timeline, which means the two points set for the Source clip will be respected and the source clip will extend beyond the end of the clip currently in the Timeline.
Note: When you trim clips in the Library, your trim markers are saved with the clip. You can use the trimmed clip with the next project or clear and reset the markers at any time.
Tip: 3-4 Point Edit Mode always overwrites any underlying content to protect track synchronization in multi-track projects. To insert clips, rather than overwrite, from the editing mode drop-down, choose Insert Mode.
1 In the Timeline, click the 3-4 Point Edit Mode  button in the editing mode drop-down.
button in the editing mode drop-down.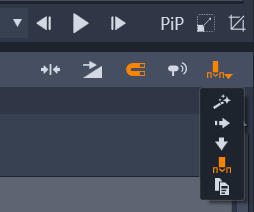
The 3-4 Point Edit Mode button is located in the drop-down at the right end of the Timeline toolbar.
2 With one or more clips already in the Timeline, drag the scrubber to the position you want, and do one of the following:
• To set an in point, click the Mark In button  on the Timeline toolbar, or press I.
on the Timeline toolbar, or press I.• To set an out point, click the Mark Out button  on the Timeline toolbar or press O.
on the Timeline toolbar or press O.Note: To clear a marker, click the corresponding button a second time. To clear both markers, click the Clear Mark In/Mark Out button  .
.
.3 If you are setting two points in the Timeline, repeat step 2.
4 In the Library, select the source clip you want, and in the Player panel, ensure the Source view is displayed (click the Source tab).
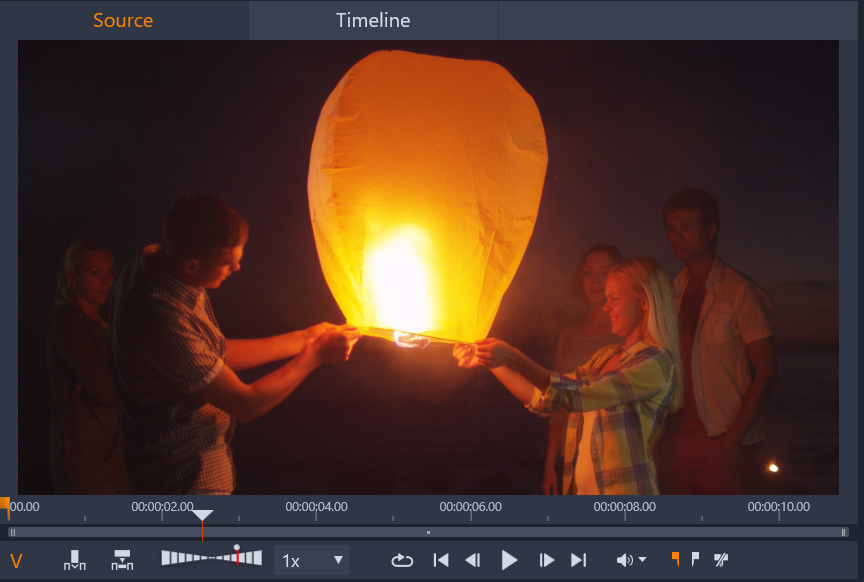
5 Using the controls below the preview, move the scrubber to the position you want, and do one of the following:
• To set an in point, click the Mark In button  or press I.
or press I.• To set an out point, click the Mark Out button  or press O.
or press O.6 If you are setting two points for your source, repeat step 2, but the total points for the Timeline plus the source should be 3.
7 In the Timeline, select the track where you want to add the source clip, and do one of the following:
• Below the Preview, click the Keep Speed button  .
.
. • From the Library, drag the source clip to the track.
8 When the Fit Clip window appears, choose the option you want from the message window.
The clip is added to the Timeline according to the points set.
1 In the Timeline, click the 3-4 Point Edit Mode button in the editing mode drop-down.
button in the editing mode drop-down.2 With one or more clips already in the Timeline, drag the scrubber to the in-point position you want, and click the Mark In button  on the Timeline toolbar.
on the Timeline toolbar.3 In the Timeline, drag the scrubber to the out-point position you want, and click the Mark Out button  on the Timeline toolbar.
on the Timeline toolbar.4 In the Library, select the source clip you want, and in the Player panel, ensure the Source view is displayed (click the Source tab).
5 Using the controls below the preview, move the scrubber to the in-point position you want, and click the Mark In button  or press I.
or press I.6 Move the scrubber to the out-point position you want, and click the Mark Out button  or press O.
or press O.7 In the Timeline, select the track where you want to add the clip.
8 Below the preview, click the Fit to Duration button  .
.
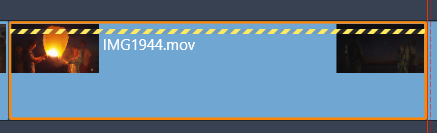
.Note: The speed of the clip will be adjusted to fit the duration between the in and out points in the Timeline. Unless the clip duration and Timeline duration are exactly the same, a yellow dashed line appears across the top of the clip to indicate that the original speed has been modified. If your clip includes audio, the quality of the audio will be affected and sped up or slowed down to correspond with the new clip duration.
Note: A Fit Clip window displays when you add the clip to the Timeline. Accept the default option to maintain a 4-point edit. If you decide to override a point (to essentially use a 3-point edit), click another option in the window.