About effects
Like other resources for your project, effects are stored in the Library. As with other types of Library resources, you can use all the usual features – Collections, ratings, tags, and so on – to help you organize the many effects available.
Modifications that you make in the Editor panel are saved automatically. See The Settings for further information.
In the timeline, clips to which an effect has been added are indicated by a brightly-colored upper border. Both this clip effect indicator and the clip itself provide useful context menu commands for effect management.
The clip effect indicator is a contrasting stripe along the top edge of any clip to which an effect has been applied.
1 From the Edit tab, click the Navigation bar for the Library panel, and choose Effects  .
.
.2 Navigate to the category you want, and in the library, click an effect thumbnail.
You can preview the effect in the Player panel.
3 Drag the effect that you want to apply to a media clip in the timeline.
A pink line appears above the clip to indicate that an effect has been applied.
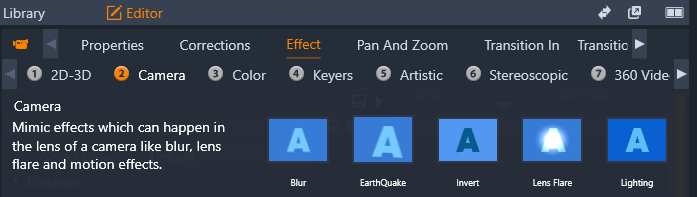
4 To edit the settings for the effect, click the Editor panel, choose Effect, and adjust the settings for the effect, adding keyframes if you want to vary the settings. At any point, you can return to the original settings by choosing Default from the Select preset dropdown menu for the effect.
If the effect controls are not displayed (collapsed), click the bar with the name of the effect in the Editor panel to display the controls area.
You can also apply an effect for a clip selected in the timeline by clicking the Editor panel > Effect, clicking one of the numbered categories, and choosing an effect from the thumbnail bar that displays.
• In the timeline, right-click a clip that has effects applied and do one of the following:
• To remove one effect, choose Effect > Delete, and choose the effect that you want to remove.
• To remove all effects, choose Effect > Delete All