Controlling speed with Time Remapping
You can adjust the speed for your video clips. You can apply a slow motion or fast motion effect to the entire clip, or you can use keyframes to speed up some scenes in a clip, while slowing down other scenes. For example, you might speed up the section of a clip showing the approach to a ski jump, and slow down the section with the aerial part of the jump.
Clips with speed changes applied are identified in the Timeline by a yellow dashed line across the top of the clip.
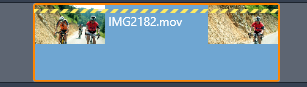
A yellow dashed line across the top of a clip indicates that the speed has been changed.
The following controls and options are available for the Time Remapping feature:
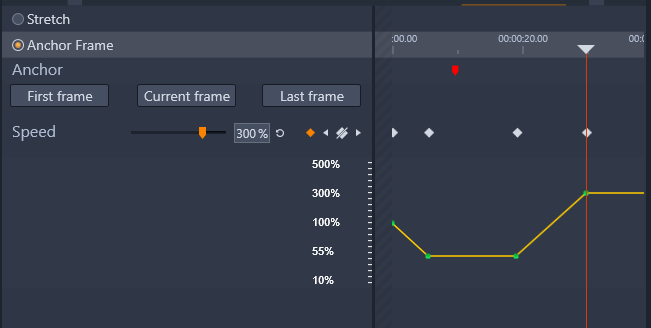
• Anchor: An anchor serves as a fixed point in the Timeline around which the speed changes occur. You can choose between First frame, Last frame, or Current frame (as indicated by the current position of the playhead). This can be useful for coordinating action between the speed-affected clip and material such as background music on other tracks.
• Stretch: Under this option, the first and last frames of the clip as currently trimmed will remain locked when the clip is trimmed on the timeline. Shortening the clip, instead of trimming material from the end, speeds it up just enough so that it finishes at the same frame as before. Lengthening the clip by trimming its end rightwards slows it down rather than exposing any trimmed material.
• Reverse Clip: Reverses the direction of playback (backwards) for the entire clip without affecting the speed. Synchronous audio, if any, is suppressed with this option, since it is generally undesirable to play sound backwards. If you want to reverse one section of a clip, you must split the clip to isolate the section that you want to reverse.
• Smooth Motion: This option applies a special transition technique to achieve maximum fluidity of movement from frame to frame.
• Hold Pitch: This option maintains the original pitch of the recorded audio even when it is played back accelerated or slowed. The function becomes less effective the more the speed is changed. Beyond certain limits, it is switched off completely.
For information about working with keyframes, see Using keyframes.
1 In the Timeline, select the clip you want to adjust.
2 Open the Editor panel, click Time Remapping (appears towards the end of the Editor categories bar, you might need to use the scroll arrow to reveal it).

3 Click the Anchor Frame option.
4 In the Anchor area, choose one of the following anchor frames:
• First frame
• Current frame
• Last frame
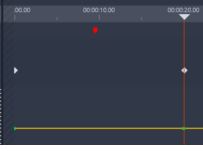
The anchor frame appears as a red marker in the Keyframe view and serves as a fixed point around which the speed adjustments will occur.
5 In the Keyframe view, position the scrubber where you want to add a keyframe and click the Add/Remove Keyframe button, and drag the corresponding node on the yellow speed line up (to increase the speed) or down (to decrease the speed). You can also set the speed for a keyframe by adjusting the Speed slider or by typing a precise value in the Speed box and pressing Enter.
For more information about using keyframes, see Using keyframes.
6 Apply as many keyframes and speed changes to the clip as you want.
1 In the Timeline, select the clip you want to adjust.
2 Open the Editor panel, click Time Remapping (appears towards the end of the Editor categories bar, you might need to use the scroll arrow to reveal it).
3 Click the Stretch option.
4 In the Timeline, position the cursor along the inside edge of the clip end that you want to adjust, and drag to increase or decrease the length of the clip.
The speed of the clip is adjusted accordingly.
1 In the Timeline, select the clip you want to adjust.
2 Open the Editor panel, click Time Remapping (appears towards the end of the Editor categories bar, you might need to use the scroll arrow to reveal it).
3 In the Video area, enable the Reverse Clip check box.