Split screen video templates
You can easily create a split screen video in Pinnacle Studio to play multiple videos in a preset or customized template. Custom templates can include dynamic changes and 3D motion.
B
You can use a template to create a split screen video project or create your own split screen template.
Before you start
• Ensure that the video clips you want to use are imported to the Library and easy to access from a project bin or collection.
• Preview the video clips you want to use so that you have an idea what shapes will suit the content that you want to focus on. For example, if the main action is vertical, it won’t fit a horizontal shape very well.
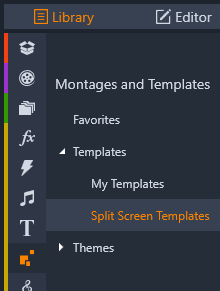
1 From the Library navigation bar, choose Montages and Templates > Templates > Split Screen Templates.
2 Drag the thumbnail for the template that you want to use into the timeline.
3 In the timeline, right-click the template and choose Open in Sub Editor.
The template expands into separate tracks in the Sub Editor window. A track is added for each area of the template (tracks visually indicate which area they correspond to).
4 From the Sub Editor Library panel, drag a video clip onto each track.
5 To adjust the clip within the template area, click a track, and in the Player panel, click the PIP Scale Mode button  .
.
.A semi-transparent view of the clip displays over the template base.
6 In the Player panel, do any of the following:
• Resize the selected clip by dragging the sizing nodes (orange dots) that appear in the preview window.
• Position the clip by dragging it to fill the corresponding area of the template.
• Rotate the clip by dragging the rotation handle (node that extends above the sizing rectangle).
7 In the timeline, click another track to adjust the other clips in the template.
8 When you are finished, click OK to exit the Sub Editor and collapse the split screen elements onto a single track in the timeline.
1 In the Timeline, click the Split Screen Template Creator button  .
.
.In the Montage/Template Editor, choose a tool from the Shape Tools palette, and drag in the editor window to split the area into different clip zones. A number appears in each clip zone.

2 To adjust the lines and shapes, in the Shape Tools palette, choose the Select tool  . You can drag the lines and shapes to reposition them and resize them. You can also adjust the Rotation, and Border (Width, Color, Opacity), and apply 3D Effect options (Swivel and Tilt).
. You can drag the lines and shapes to reposition them and resize them. You can also adjust the Rotation, and Border (Width, Color, Opacity), and apply 3D Effect options (Swivel and Tilt).3 If you want to add dynamic changes or 3D motion to your template, for each object, you can add keyframes along the timeline at the bottom of the template window. You can then choose the settings you want to apply to a keyframe, and press Enter.

4 If you want to save content with your template (for example, an image or video that will be part of the template), navigate to the content you want to add and drag the corresponding thumbnail to the number you want in the drop zone. You can adjust the properties for a template video by setting values for any of the properties in the Video Properties area.
Note: To remove the content, right-click it in the drop zone, and choose Remove Media.
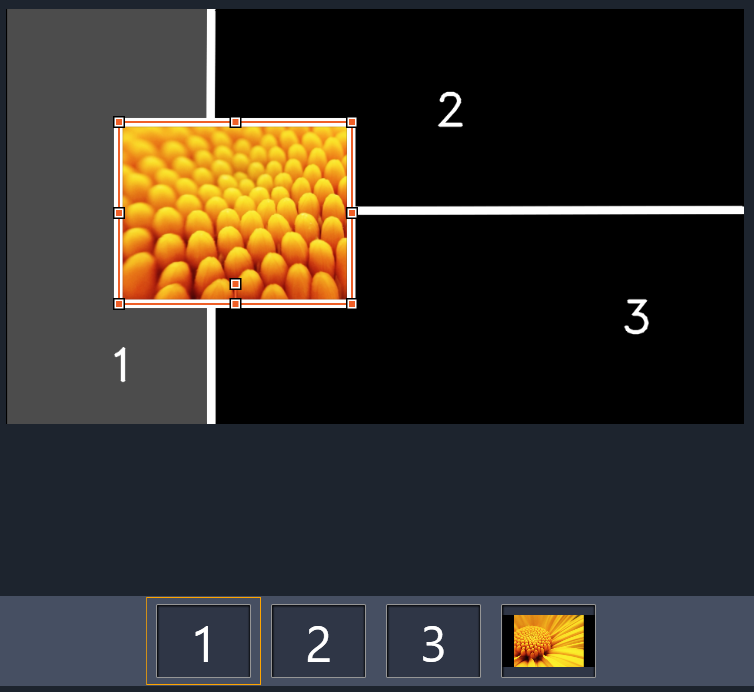
A numbered drop zone appears along the bottom edge of the preview pane.
5 When your template is complete, click Save As to save your template to the Library (Montages and Templates > Templates > My Templates).
6 Click OK to go to the Sub Editor.
7 Add and edit the clips as you would with an existing template.
8 When you are finished, click OK to exit the Sub Editor and collapse the split screen elements onto a single track in the timeline.