Using Audio Ducking to automatically adjust volume
Audio ducking is used to automatically lower the volume of one track so that you can hear another track better. For example, if you have a video project that includes music and voiceover, you can use audio ducking to automatically decrease the music volume when the narrator is speaking. You can adjust the threshold that triggers “ducking” and you can adjust by how much the volume of the background track will drop.
1 In the Timeline, select the track that you want to “duck” (to selectively lower the audio level), and click the Audio Ducking button  on the toolbar.
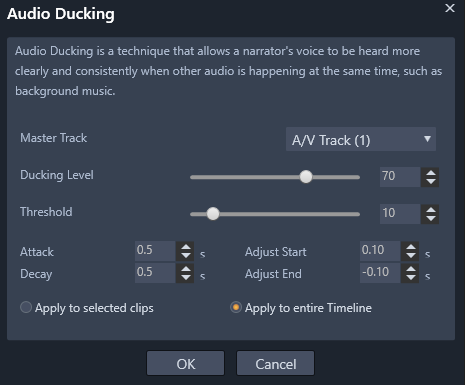
on the toolbar.2 In the Audio Ducking dialog box, choose the main track that you want to hear from the Master Track box.
3 Adjust the following controls:
• Ducking Level — determines the volume decrease. Higher numbers result in a lower volume.
• Threshold — determines the master track volume level that will trigger a volume decrease for the other track(s). You will likely need to experiment with different settings to achieve the results you want.
• Attack — determines the time it takes to lower the volume to the Ducking Level setting after the Threshold is met.
• Decay — determines the time it takes to return to the regular clip volume from the Ducking Level
If you want to apply ducking to all non-Master audio tracks, enable the Apply to entire Timeline option. If you want to apply ducking to the selected track only, enable Apply to selected clips.
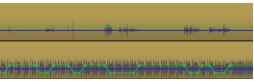
In this example, the top track is a voiceover track that was set as the Master Track. Ducking was applied to the music track on the bottom to selectively lower the music volume whenever the narrator was speaking on the voiceover track, as indicated by the blue waveform. The green line represents the volume level and shows where the volume changes occur.
• In the Timeline, right-click a track that has Audio Ducking applied, and choose Remove Ducking.