Using Slip, Slide, Roll, or Stretch tools on the Timeline
You can adjust a clip in the Timeline in a number of different ways—especially if you are using trimmed clips. Trimmed clips have hidden head frames (frames trimmed from the beginning of a clip) and tail frames (frames trimmed from the end of a clip).
It’s helpful to think of the clips in the Timeline as consisting of two elements: a window (the duration for a clip, defined by the start and end points for each clip that you see on the Timeline), and the content (all the frames included in the full, pre-trimmed clip, whether they are hidden by a trim action or not).
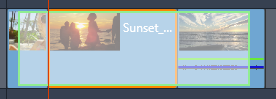
This example shows a sequence in the Timeline, with a clip selected (orange box “window”). The Slip tool is active and as you drag, the full, pre-trimmed length of the clip is revealed (green box “content”). You can then see which frames will appear in the “window” that is defined on the Timeline.
The following tools let you adjust clips on the Timeline.
• Slip: Lets you drag in the Timeline to change what frames you see (content) without affecting the “window” (duration) for the clip, essentially moving the trim markers for the source clip.
• Slide: Lets you move the clip “window” along the timeline without changing duration, essentially moving the trim markers in the Timeline to reveal different content.
• Roll: Lets you adjust the length of the clip “window”, affecting the duration of the selected clip and the adjacent clip.
• Stretch: Lets you adjust the size of the clip “window”, thus changing the duration on the Timeline, expanding or contracting the content (adjusting the speed) in order to fit the new duration without changing which frames are shown.
The full pre-trimmed length of the clip determines the limits for your adjustments. For some changes, the pre-trimmed length of the adjacent clip is also a limiting factor. For example, if you use the Roll tool to decrease the Timeline duration of a selected clip, the Roll tool will stop at the point where the adjacent clip (which is increasing in duration) has run out of frames.
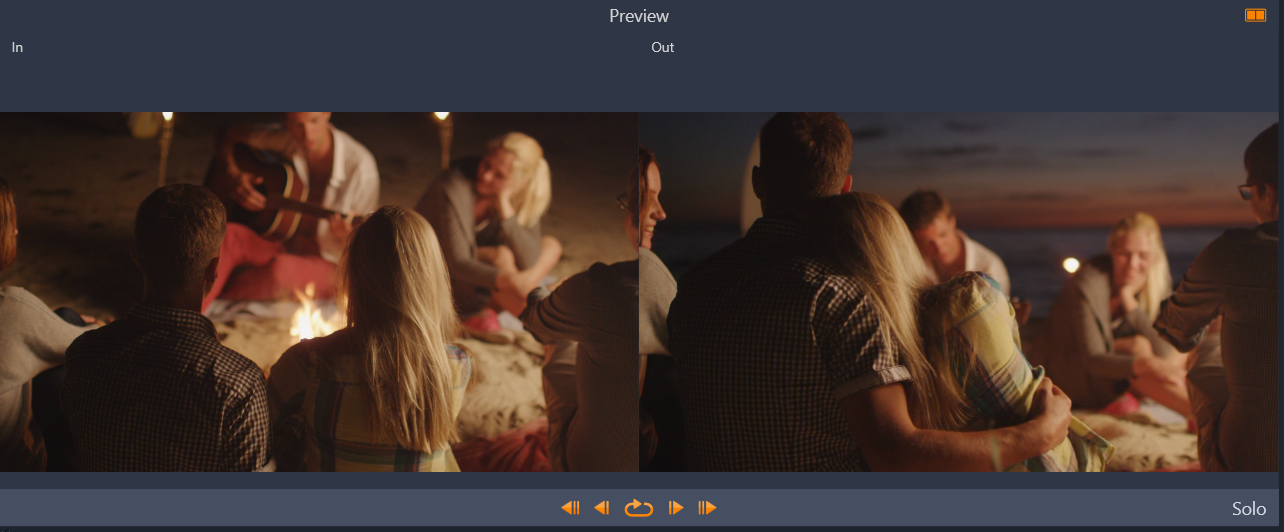
In the Player panel, you can view the in point and out point for your selected clip when the Slip, Slide, or Roll tools are active.
1 In the Timeline, select a trimmed clip that is part of a sequence.
2 On the Timeline toolbar, click the Slip tool.
3 Drag in the Timeline to change which frames will display in the Timeline.
The Player panel displays a dual pane view of the In frame and Out frame to help you set the position of your clip in the Timeline.
1 In the Timeline, select a trimmed clip that is part of a sequence.
2 On the Timeline toolbar, click the Slide tool.
3 Drag in the Timeline to adjust the position of the clip and to change which frames are displayed.
The duration of the selected clip is not affected, but the duration of adjacent clips is affected.
Note: A gap can result if the adjacent clip is not long enough to fill the area left by the moved clip.
1 In the Timeline, select a trimmed clip that is part of a sequence.
2 On the Timeline toolbar, click the Roll tool.
3 In the Timeline, drag an edge of the selected clip to change the duration of the clip.
The duration of the adjacent clip is also affected.
1 In the Timeline, select a clip that is part of a sequence.
2 On the Timeline toolbar, click the Stretch tool.
3 In the Timeline, drag an edge of the selected clip to change the duration.
Although the content of the selected clip remains the same, the speed changes (as indicated by a yellow dashed line across the top of the clip) to fit the new duration.
The duration of the adjacent clip is also affected.