Tutorial: How to transfer VHS tapes and other analog videos to your computer using Pinnacle Studio for Dazzle
Pinnacle Studio for Dazzle makes it easy to transfer videos saved on VHS tapes and other analog sources to your computer. The process is called “capturing” and makes use of the Dazzle USB video capture device. From there, you can edit, save, share, or archive the video files.
Although there are a range of supported devices that you can connect to your Dazzle USB video capture device, for simplicity, this tutorial will use a VCR as an example.
Note: You must have the Dazzle USB video capture device connected to your computer before you can install the software and capture video.
1 After installing the Pinnacle Studio for Dazzle software, ensure that your Dazzle USB video capture device is connected to both your computer and your source video device (such as a VCR with a VHS tape).
2 On your computer, open Pinnacle Studio for Dazzle.
3 At the top of the application window, click the Import tab.

4 If the Dazzle capture device is connected and recognized by your computer, the Dazzle Video Capture page will be open by default. If the page isn’t displayed, click the Dazzle Video Capture tab (a horizontal scrolling bar with page tabs appears below the Import button).

5 To preview the content you are going to capture, on your source device (VCR, for example), use the controls on the device to play the content. The content should show on the Dazzle Video Capture page.
Note: The volume level of the source video is displayed as a colored bar to the right of the preview.
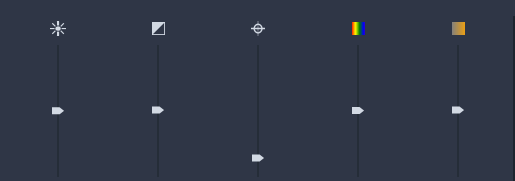
6 On the Dazzle Video Capture page, you can accept the default settings, or change any of the following:
• Use the vertical sliders to adjust Brightness, Contrast, XXX
• Mode: Choose from 4:3 or 16:9 aspect ratio (most older video is 4:3).
• PAL, NTSC, or SECAM: Video standard formats. NTSC is standard in North America, PAL is common in Europe, and SECAM is common in areas of Asia.
• Settings: If you want to change XXX
• Scene detection: If this is turned on, it will automatically generate separate video clips when a break is detected during playback (such as a few seconds of blank video between each scene recorded on the source). Turn it off if you want to control this manually by starting and stopping the capture process.
• Countdown: If you want recording to start immediately after you click the Start Capture button, choose Off. If you prefer a three second delay, choose On.
7 In the File Name box, type a file name.
8 Choose source (see drop-down menu to right of file name?) XXX?
9 In the Save to box, choose a location where you want to save the video file.
If you want you can also create a subfolder by choosing an option from the Subfolder drop-down menu.
10 In the Import to area, click the icon beside Project Bins, and in the New Project Bin window, type a name for your project (for example, VHS Transfer, Video from 1998, Old Family Videos...). This will help you find your captured videos.
11 Using the controls on your source device (VCR, for example), cue your source video to where you want to start recording. The video should appear in the Pinnacle Studio for Dazzle window.
12 Click the Start Capture button.
13 To stop recording, click the Stop Capture button.
A thumbnail of the captured video clip appears below the preview area.
1 After you finish capturing your video, click the Edit tab (beside the Import tab) at the top of the window.
2 If you designated a project bin for the captured video, the project bin with the captured video clips will be open in the Library panel by default (click the project bin if it isn’t open). Otherwise, you can click Collections > Latest Import.
3 Drag the clip you want to work with from the Library panel to a track on the Timeline.
4 Double-click the clip on the Timeline.
The Editor panel replaces the Library panel.
5 Click a page tab (a horizontal scrolling bar with page tabs appears below the Editor). For example:
• Properties: Provides settings that let you size, rotate, set the opacity, add a border, and crop the clip.
• Color: Lets you fix exposure, contrast, saturation, clarity and more. If you use Save as LUT, you can apply those settings to other clips (choose LUT Profile > Browse) or simply use a preset LUT.