Editing Movies
The first step in any movie editing session is to start or open a movie project.
To launch a new production: Choose File >New > Movie from the main menu. Before adding your first clip, make sure that the timeline video format will be right for the project (see below).
To edit an existing movie: Select a recent project from the File > Recent menu; click File > Open to browse for a movie project to open; or locate the movie you want to open in the Projects folder of the Library, and double-click the thumbnail.
If your movie has been stored as a project package, it must be unpacked before editing. Find your project in the Studio Projects group in the Library, and use the Unpack project package command on the thumbnail’s context menu.
Alternatively, you can click File > Open and find the project package in Explorer by choosing Studio Project Package (axx) in the file extension box.
When unpacking is finished, the unpacked project is added to the Library and opened on the project editor timeline, where it can be edited as usual.
To open a Studio project: Choose File > Import previous Pinnacle Studio projects. Please note that some features of projects created with a previous version of Studio may not be supported in the current version.
To import a Studio for iPad project: Choose File > Import Studio for iPad App projects.
To start editing a new project, verify that the video format settings of your project – aspect ratio, 2D or 3D, frame-size and playback speed – are as you want them. See Project settings for configuring the automatic feature, and Timeline settings for instructions on entering project settings manually.
Depending on your timeline settings, clips in some formats might not be instantly playable. Such content will automatically be rendered in an appropriate format.
With only minor exceptions, timeline tracks in Pinnacle Studio do not have specialized roles. Any clip can be placed on any track. As your projects become more complex, however, you will find it increasingly helpful to give some thought to the organization of tracks, and rename them according to their function in the movie. For information on track properties and how to edit them, please see The timeline track header.
Most types of Library asset can be brought onto the timeline as independent clips. The types include video and audio clips, photos, graphics, ScoreFitter songs, templates and titles. You can even add your other movie projects as container clips that work just like video clips in your project. Disc projects, however, cannot be added as container clips to a timeline, since they require a capability – user interactivity – that timeline clips don’t have.
Drag-and-drop
Drag-and-drop is the commonest and usually the most convenient method of adding material to a project. Click any asset in the Library panel and drag it wherever you like on the timeline.
When crossing into the timeline area during the drag and continuing to the target track, watch for the appearance of a vertical line under the mouse pointer. The line indicates where the first frame of the clip would be inserted if dropped immediately. The line is drawn in green if the drop would be valid, and red if it would not be possible to insert a clip where indicated (because the track is protected, for example).
It is possible to insert multiple clips into the timeline at the same time. Simply select the desired Library assets, then drag any one of them to the timeline. The sequence in which the clips appear on the track corresponds to their ordering in the Library (not the order in which you selected them).
Magnet mode: By default, magnet mode is switched on. This makes it easier to insert clips so that their edges meet exactly. The new clip snaps to certain positions, like the ends of clips or the positions of markers, as if drawn by a magnet once the mouse pointer gets close to the potential target.
On the other hand, don’t worry about whether the first clip is right at the start of the timeline. Not every movie starts with a hard cut to the first scene!
In order to eliminate the confusion created by complex editing situations, Pinnacle Studio provides a full dynamic preview of the results of editing operations as you drag clips around on the timeline. If things seem to jump around a bit more than you’re used to during timeline editing, this is the cause. Don’t worry: you will quickly get used to and learn to take advantage of the extra information provided. Take it slowly at first. Watch the changes on the timeline as you hover the dragged item over various possible landing places, and complete the drop when you see the result you want.
If it turns out that drag-and-drop isn’t working the way you want, either press Esc or move the mouse pointer out of the timeline area and release the button. Either of these abandons the drag-and-drop operation. To call back a drag-and-drop after it’s complete, press Ctrl+Z or click the undo button.
Don’t forget that you can vary many timeline editing operations with alternative mode: just press and hold Alt while dragging or trimming. In a one-for-one clip replacement, Shift is also significant.
After you have assembled an assortment of clips on a timeline track, it’s only matter of time before you want to start changing things around. For instance, you might want to:
• Fill a gap with clips.
• Insert some clips before a specific clip.
• Replace a clip already on the timeline with a different one.
The smart editing mode helps you achieve these goals with ease.
Smart mode makes it simple to fill a particular timeline gap with new material, for example. Rather than having to painstakingly pre- trim the new material to the space available, you simply drag items into the gap. Any clips that are not needed for filling the gap will be dropped, and the last clip used will automatically be trimmed to the appropriate length. No clips already on the timeline are affected, so no synchronization problems can result.
Suppose that your goal is to add new material to the timeline at a point where there is an existing clip. You don’t want the clip already there to be overwritten, however; you just want it (and any clips to its right) to move rightwards far enough to make room for the new material.
Here again, smart editing provides a painless answer. Simply drag the new material to the start of the clip that is in the way, rather than into a gap. The clip moves aside exactly as far as necessary.
If you drop an item onto the middle of an existing clip, rather than at a cut, the clip will be split. The new material is inserted at the point you specified, and is followed immediately by the displaced portion of the original clip.
In smart mode, synchronization of the target track with all other tracks is maintained by inserting in each of them a gap of length equal to the new clip. To avoid affecting the other tracks in this way, use insert instead of smart mode. Alternatively, pressing Alt as you drop the new material will cause it to overwrite a portion of the existing clip. A third approach is to lock any track that should not be modified, although this will affect the synchronization of clips on locked tracks with those on unlocked tracks.
To replace a clip, drag a single Library asset onto the clip you want to replace while holding down Shift. The replacement clip will inherit any effects and transitions that were applied to the original clip. Corrections are not inherited, however, since they are usually meant to address the issues of a particular media item.
In smart mode, the replace operation will succeed only if the Library clip is long enough to cover the full length of the clip being replaced. In other modes a Library clip of insufficient length will be extended using over-trimming. The direction and amount of the extension is based on your mouse position as you drag. For information on over- trimming, please see Trimming.
If the Library asset is longer than needed, it will be truncated to the same length as the clip being replaced.
In addition to dragging a clip to the timeline, you can ‘send’ it to the default track at the position of the playhead. The operation is equivalent to drag-and-drop, so smart mode is applied accordingly when deciding how other clips will be affected. The Send to timeline command is found on the context menu of an individual asset or multiple selection in the compact view of the Library.
There is also a second ‘send’ method that provides greater control.
If you click on a Library asset, the Player switches to Source mode for previewing. For trimmable media (video and audio), the Player also provides trim calipers for cutting out a starting or ending portion of the asset.
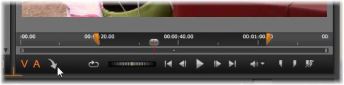
Clicking the Send To Timeline button in the Player after trimming a Library video asset.
After previewing the asset and trimming it if required, use the send to timeline button at the bottom left of the Player. As usual, the asset is added to the project on the default track and at the playhead. A useful variation is to click anywhere within the Player screen and drag the asset onto any desired timeline track. The asset is added at the drop point rather than at the playhead.