Text and text settings
For all the graphical sophistication of the Title Editor, in many instances the primary reason for using titles is the text they contain. The editor therefore provides several specialized options to help you ensure that you can get your text looking exactly the way you want. The text operations we will look at below include:
• Editing the text
• Changing fonts, font sizes and styles
• Setting text justification and flow
• Copying and pasting text properties
The areas of the Title Editor of most interest in text work are the Edit Window and the Text Settings panel. For styling a text layer, the Looks section of the Presets Selector and the Look settings panel also come into play. See Preset Looks and Look settings.
As described elsewhere, when dragging a text layer you have to be careful to click at the edge of the control frame, rather than anywhere within it, to avoid accidentally putting the layer into text- edit mode. For the operations described here, however, text-edit mode is exactly what we want. In a newly-created text layer, text- edit mode is already enabled: you can begin to type immediately and the default text will be replaced.
To activate editing for an existing text layer, click anywhere inside the control frame. Text-edit mode becomes active and – to save you an often-required step – all existing text in the layer is automatically selected. As usual, selected text is indicated by highlighting.
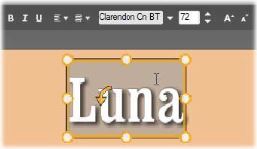
A text layer with all text selected. From left to right, the text editing controls in the header bar above govern letter styling (bold, italic, underline); text alignment and text flow; and font name and size. In text-edit mode, the mouse pointer over the layer has the ‘I-beam’ shape as shown here.
To modify the text itself, simply start typing. The highlighted text disappears and the text you type takes its place. As you type, the current insertion point (the place in the text where new letters are inserted) is indicated by a vertical line.
If you want to add new text without losing what was already there, click at the desired insertion point after putting the layer in text-edit mode, or use the arrow keys to maneuver the insertion point as desired.
You can also highlight (and thus replace) only part of the text before typing: drag across the letters with the mouse, or hold down Shift while using the arrow keys. You may also triple click to select all of the text in the layer or double click on a word to select just that word. Lastly, if you want to select all the text in the layer again, you can use the mouse or arrow keys as just described, or give the standard shortcut Ctrl+A.

The topmost Settings sub is this group of controls for editing and styling the content of the current text layer.
Using the text field
In cases where text in the Edit Window is difficult or impossible to access for editing, the text field in the panel provides another convenient way to select and edit your text. This is the approach to take if the text is off-screen at the scrubber position, which can happen when Motions are involved. The text field expands to provide up to three lines as you type, then adds a scroll bar if further lines are entered.
Styling highlighted text
Most of the Title Editor text controls are probably quite familiar to you from using similar controls in other applications. Those that apply to the highlighted text only are these:
Font styling: To set or unset the bold, italic or underline properties of the selected text, use the toggle buttons in the header bar, or the standard keyboard shortcuts Ctrl+B, Ctrl+I and Ctrl+U. The buttons light up when their respective style options are active.

Font name: Your titles are the perfect place to experiment with fancy display fonts, so you’ll likely be accessing this dropdown list quite often. If you have many fonts on your system, the list can be quite long. For ease of navigation, pressing the first letter of a font name will take you instantly to the corresponding alphabetical location in the list. Click the font you want, or move to the name using the up and down arrow keys and press Enter.
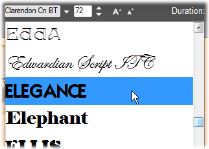
To select a font, open the dropdown list and click the one you want. The font is applied to the currently-highlighted text only.
Font size: The Title Editor provides several methods of setting the font size. You can enter a new value directly into the font-size edit field (up to 360), or use the neighboring dropdown arrow to display a list of sizes. Further to the right, the shrink font and enlarge font buttons change the size in intervals that widen as the font size increases.

With both text and shape layers, the Copy Attributes and Paste Attributes context menu items, found by right clicking on a the control frame in the Edit Window, let you copy Looks from one layer to another without having to open the Looks section of the Presets Selector.
With text, this operation also replicates the font name, size and style from one text layer to another, and also works on partial selections within text layers.
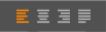
For titles with multiple lines of text, the Title Editor provides a standard menu of justification options. The default for new text layers is center justification (Align Center on the dropdown list), in which each separate line is horizontally centered in the available space. The additional options provide for Align Left, Align Right and Justify.
To accommodate the various conventions of different languages with regard to the direction in which lines of text are written, and for maximum graphical design flexibility, the Title Editor offers a menu of eight text flow options. These options, which work in concert with the justification options just discussed, affect not just the way the text is displayed but also the meaning of standard keys like Home and End.

As explained in the topic Preset Looks, the appearance of text and shape layers can be transformed by the application of Looks from the Presets Selector. In a partially-highlighted text layer, applying a Look affects only the highlighted text. In principle, each of individual character in your title could be given its own Look.