Video scene detection
Using the Library’s automatic scene detection function, video footage can be split into multiple scenes either automatically or manually. Dividing raw files into scene-length portions can make some editing tasks much less cumbersome than they would be otherwise.
The time required for scene detection varies depending on the length of the clip and the detection method selected. A progress bar keeps you informed of the status.
To initiate scene detection, select one of the methods on the Detect scenes context menu command for video assets.
By date and time: This option often results in logical scene boundaries that reflect your intention while shooting. In many digital recording formats, such as DV and HDV, a discontinuity in the recorded timecode data occurs whenever the camera is restarted after being stopped. These shooting breaks are treated as scene breaks under the option.
By content: Under this option, the scene detection tool analyzes the image content of the material frame by frame, and establishes a new scene whenever there is an abrupt change in content. However, a quick pan or rapid movement across the frame may produce some unneeded breaks.
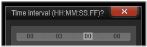
By time interval: In this variant you define the length of the scenes to be created. A small editing window opens for entering the desired value in hours, minutes, seconds and milliseconds. The scene duration has a one second minimum. Press Enter to confirm your input.
To manually split scenes in a clip
1 In the Library panel, right-click a clip, and choose Edit scenes in the context menu.
The Library panel switches to Scenes View and a pop-up player window displays.
2 In the pop-up player window, use the playback controls to pause where you want to split the scene.
3 Click the Split Scene button  to create a scene indicator thumbnail that appears in Scenes View.
to create a scene indicator thumbnail that appears in Scenes View.4 When you have set all the scenes you want, close the pop-up player window.
Note: You must turn off Scenes View before you can access the Detect scenes and Edit scenes commands in the context menu.
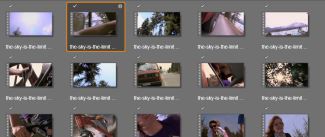
Show the scenes
To show the catalog of scenes for a particular video file, either select Show scenes from its context menu; or select the clip, then click the Scenes view button  that appears at the bottom of the Library panel.
that appears at the bottom of the Library panel.Scene view is a temporary viewing mode. The orange bar at the top of the Browser alerts you that scene view is active. At the right hand end of the bar is an x button you can use to terminate the mode. Clicking the Scenes view button again has the same effect.
A single video file can contain many scenes. This makes the footage easier to manipulate during editing than if it were treated as a single segment.
During editing, scene clips behave identically to other video clips.
To empty the entire list of scenes for a video file, select Scene detection > Remove scenes on the asset’s context menu.
To remove individual scenes, select one or more scenes then press Delete.