Blend Modes
Blend modes let you choose how a clip blends with an underlying clip—from creating a superimposed effect, to blending masked areas, or creating light bleeds or other color and exposure effects. Each blend mode uses a different formula to combine the color and brightness values in a selected clip with the values in an underlying clip. It doesn’t matter if several assets are used to create the underlying background for the clip that you apply a blend mode to—the blend formula is applied based on what is visible when the blend is applied.
Blend Mode can be found in the Editor panel, on the Properties page. The result of a blend mode can also be modified by adjusting the Opacity setting for the clip.
Pinnacle Studio includes the following blend modes in the Blend Mode drop-down menu. In the first example, None, you can see the two clips that are used for all the blend mode examples.
Blend Mode | Example |
|---|---|
None: No blending—this is the default setting. The underlying clip is covered by the clip in the track above it unless the Opacity of the clip has been adjusted. Example: The sunset clip on Track 1 will completely cover the lighthouse clip on Track 2 when None is set as the blend mode. |  |
Color Burn: Darkens the background clip and increases its contrast with the selected clip. | 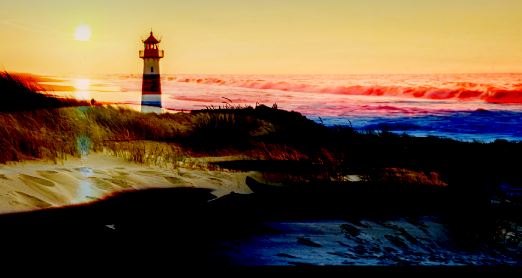 |
Color Dodge: Lightens the background clip and decreases its contrast with the selected clip. | 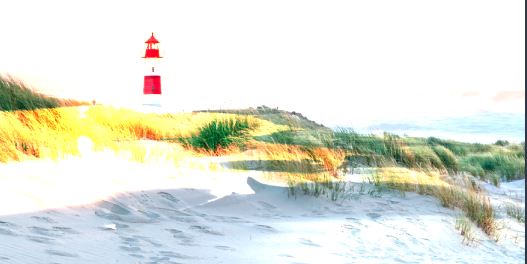 |
Darken: Compares the selected and background clips and displays whichever pixels are darker. | 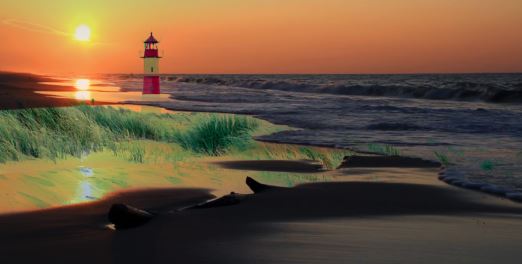 |
Dissolve: Replaces pixel colors in the selected clip from the background clip. The greater the opacity of the selected clip, the fewer pixels are replaced. |  |
Hard Light: Adds highlights or shadows depending on the brightness of the selected clip. |  |
Hard Mix: Adds the selected clip RGB values to the background clip. | 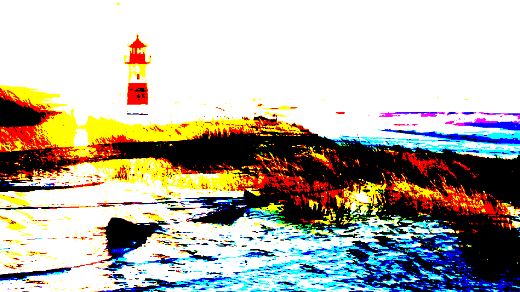 |
Lighten: Displays the pixels in the selected clip that are lighter than those of the background clip. |  |
Linear Burn: Darkens the background clip depending on the brightness of the selected clip. Darker than Multiply but less saturated than Color Burn. | 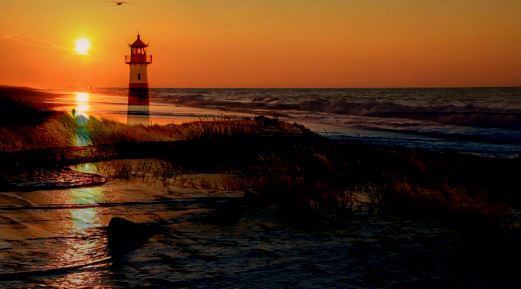 |
Linear Dodge: Lightens the background clip depending on the brightness of the selected clip. |  |
Linear Light: Lightens or darkens the background clip depending on the brightness of the selected clip. Applies Linear Dodge blend to brighter pixels and Linear Burn blend to darker pixels. |  |
Multiply: Combines colors of the selected and background clips and retains darker pixels to produce a darker result. |  |
Overlay: Displays patterns or colors of the selected clip and preserves the shadows and highlights of the background clip. |  |
Pin Light: Lightens and darkens simultaneously and removes mid-tones. |  |
Screen: Removes more of the dark pixels, resulting in smoother transitions. Similar to Multiply, but multiplies the light pixels instead of the dark pixels. |  |
Soft Light: Adds soft highlights or shadows. |  |
Vivid Light: Increases or decreases contrast depending on the brightness of the selected clip. |  |
1 In the timeline, double-click a clip that you want blend. There must be visible content on the tracks below for the clip to blend.
2 In the Editor panel, on the Properties page, choose a blend mode from the Blend Mode drop-down menu.
The result of the blend mode appears in the timeline preview of the Player panel. You can preview and experiment with different blend modes until you find the result you want.