SmartMovie
SmartMovie is a built-in project generator that allows you to create a slideshow or movie production automatically based on media you supply. The production will include animated transitions, a full music soundtrack and eye-catching image effects.
At the bottom of the Library, just click SmartMovie.
To begin, select from the Library a series of photos or video files. Your music might come from digital audio assets already in the Library, or you can cook up a soundtrack on the spot with the ScoreFitter tool.
That might be all it takes, though you can work on the project further with manual editing if you wish. Once you have a final product you like, it takes only a few clicks to burn it onto a disc or save it as a file for other uses, such as upload to the web.
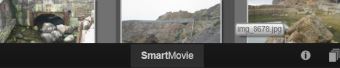
The SmartMovie panel that slides up into the window from below contains three subs. The leftmost of these presents information about SmartMovie, and advice on how many files to include. The center sub is a storage area with bins for photos and other images (top) and audio. The right sub contains controls for customizing the show.
To add media to the production, drag them from the Browser into the upper bin in the storage area. Drag thumbnails within the storage area to get the order you want. Continue adding further images until you are satisfied.
To add music, drag one or more sound files to the lower bin in the storage area. Alternatively you can click the clef button  in the bottom left corner of the audio bin to create a music soundtrack in ScoreFitter.
in the bottom left corner of the audio bin to create a music soundtrack in ScoreFitter.As media are added, the total running time of the source material is displayed in the top-left corner of the bin. This is not necessarily the length of the resulting movie.
Once your media are in place, click the Preview button on the footer bar below the tool. The project is created and presented in a preview window. If necessary, you can return to the settings to modify your media selections.
When you click the Preview button, the media you have chosen are automatically saved in a Collection named Latest Smart Creation. If you expect to make further use of this grouping of assets, rename the Collection to prevent it being overwritten the next time you look at a SmartMovie preview.
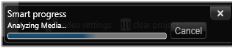
The analysis phase of generating a SmartMovie may take some time to complete the first time the material is analyzed. Full rendering of the project, with progress indicated by shading on the time-ruler of the Player, may introduce an additional delay before a fully-detailed preview is available.
The Edit button brings your production to the Movie Editor timeline for detailed editing. It’s a good idea to check that the timeline video settings match your requirements for the show. The video settings button on the settings panel provides access to these. Also see The Project Timeline.

When the presentation is the way you want it, click Export to burn a disc or create a file for upload.
The photos in the upper bin are displayed as icons, while the music and sound files in the lower bin appear as text lines giving the file name and duration of each asset. Both bins support multiple selection, drag-and-drop reordering, and a context menu with just two commands:
Delete selected: The selected media are removed from the SmartMovie production. They remain available in the Library for other uses. (Shortcut: Delete.)
Open editor: This command opens the Corrections tool of the Photo or Audio Editor. Any modifications you make to the media apply only within this SmartMovie production. (Shortcut: double-click.)
The settings on this sub customize the SmartMovie production.
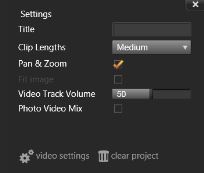
The settings entered will be used the next time the production is generated. The video settings button lets you set up the timeline options that will apply if you take the production into the Movie Editor. The clear project button removes all media from the project and returns to default settings.
Title: Enter a caption to be used as the main title of the movie.
Clip lengths: The visual tempo of your movie increases as the clip length is shortened. Maximum uses the original length of the asset.
Pan and zoom: Checking this option enlivens your presentation with simulated camera moves.
Fit image: Check this option to enlarge material that is too small for the frame format of your project.
Video Track Volume: Set the volume of the original audio in the video segments. For a soundtrack of background music only, set to zero.