Using the Importer
The very first step in importing is to open the Studio Importer by clicking the Import button at the top left of the screen.
The Importer consists of a large main area that includes source tabs along the top of the Importer, and a number of smaller areas. Your choice of input source in turn determines the rest of the Importer display. Above all, the set of controls and views offered in the main area for preview, browsing and selecting material depends on the chosen import type.
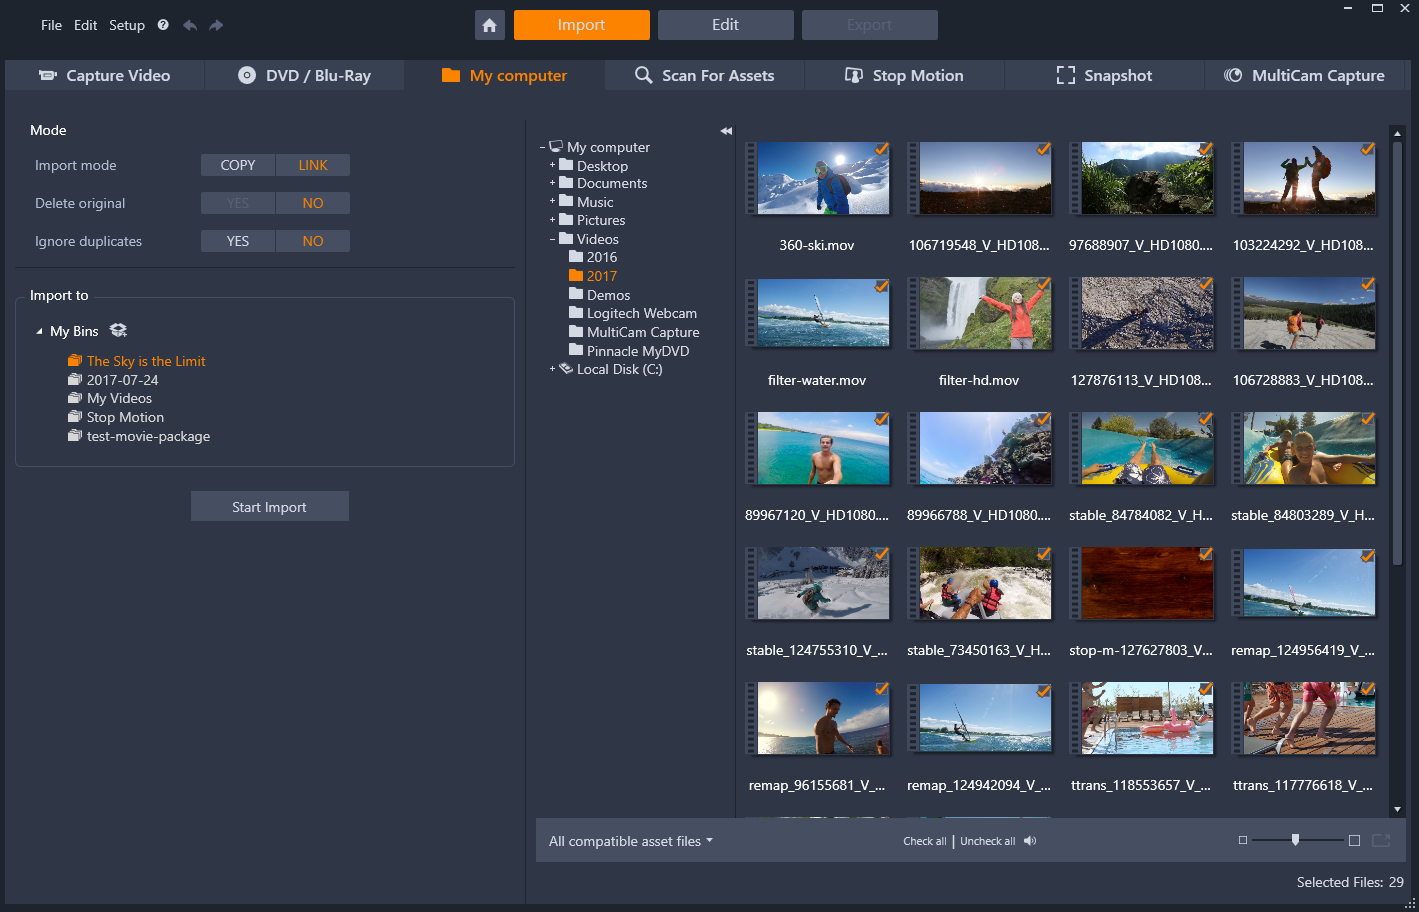
Studio Importer
Importing can be regarded as a four-step process:
1 Select the import source from the tabs along the top of the page.
2 Confirm or adjust the import settings.
3 Select material to import from the chosen source.
4 Initiate the import operation.
At this point, Studio begins transferring the requested audio, video and pictorial material from the source device to your hard drive (if necessary), using the locations set in the Import to area. The media are then immediately added to the Library. (See The Library.)
This transfer process is variously called ‘capturing’, ‘importing’ or ‘downloading’, depending on the media involved and the method of transfer. Because most audiovisual recordings now are stored in digital form from the start, transfers can typically be achieved with no loss of quality. Only when transferring from analog or tape-based sources (e.g. VHS, Hi8 or DV tape) is there still a ‘capture’ process, often involving conversion to digital form. The terms ‘import’ and ‘importing’ can be used to signify all methods of bringing images and sound into the Library for use in your productions.
Pinnacle Studio will recognize content as stereoscopic 3D and mark it as such for files with the following properties:
• MTS: MVC, SBS50, SBS100 (if H264 stream markers are present)
• WMV: Multistream, SBS50, SBS100, TAB50, TAB100 (if metadata tags are present)
• MP4, MOV with H264: SBS50, SBS100 (if H264 stream markers are present)
• MPO: Multistream
• JPS, PNS: SBS50, SBS100
If Studio has not correctly identified your 3D media, choose the correct setting from the Stereoscopic 3D dropdown in the Adjustments group of Corrections tools. Please see Adjustments for details.